Showing posts with label exterior. Show all posts

12.16.2014

Adding corbels...


Tudor style homes usually include corbels.  Our tiny tudor had them at one time, but must have been removed when all of the hardie board was replaced...


You can faintly see the imprint of where three corbels used to sit under the large jut out piece above the dining room window...


Today we decided to build some corbels to put under that eave and give it a bit more balance.

Then we realized that we were going to have to make some major purchases, like a band saw along with something to round out the wood, like a lathe.  It seemed a bit silly to purchase heavy tools just to make some simple corbels.  So we went shopping on line...

We found some lovely corbels at a reasonable price over at ProWoodMarket  These were our favorite...


They are a smooth cedar, so we are thinking we will stain them in the dark walnut to match our front door.  That way there is a bit of contrast between all the painted finishes up front.   They should be arriving this week and we hope to get them up on the house over the weekend.

Nothing like tackling a few home improvement projects over the holidays!

12.09.2014

Building a window box...

Since Travis is off for a few days we decided to tackle a few projects here at the tiny tudor.   Originally, our little house had three corbels on the front.  You can see the marks on the bricks where they used to be, under the top part of the house that sticks out over the dining room window.  Having corbels there would make the top part look a bit less "floaty"...


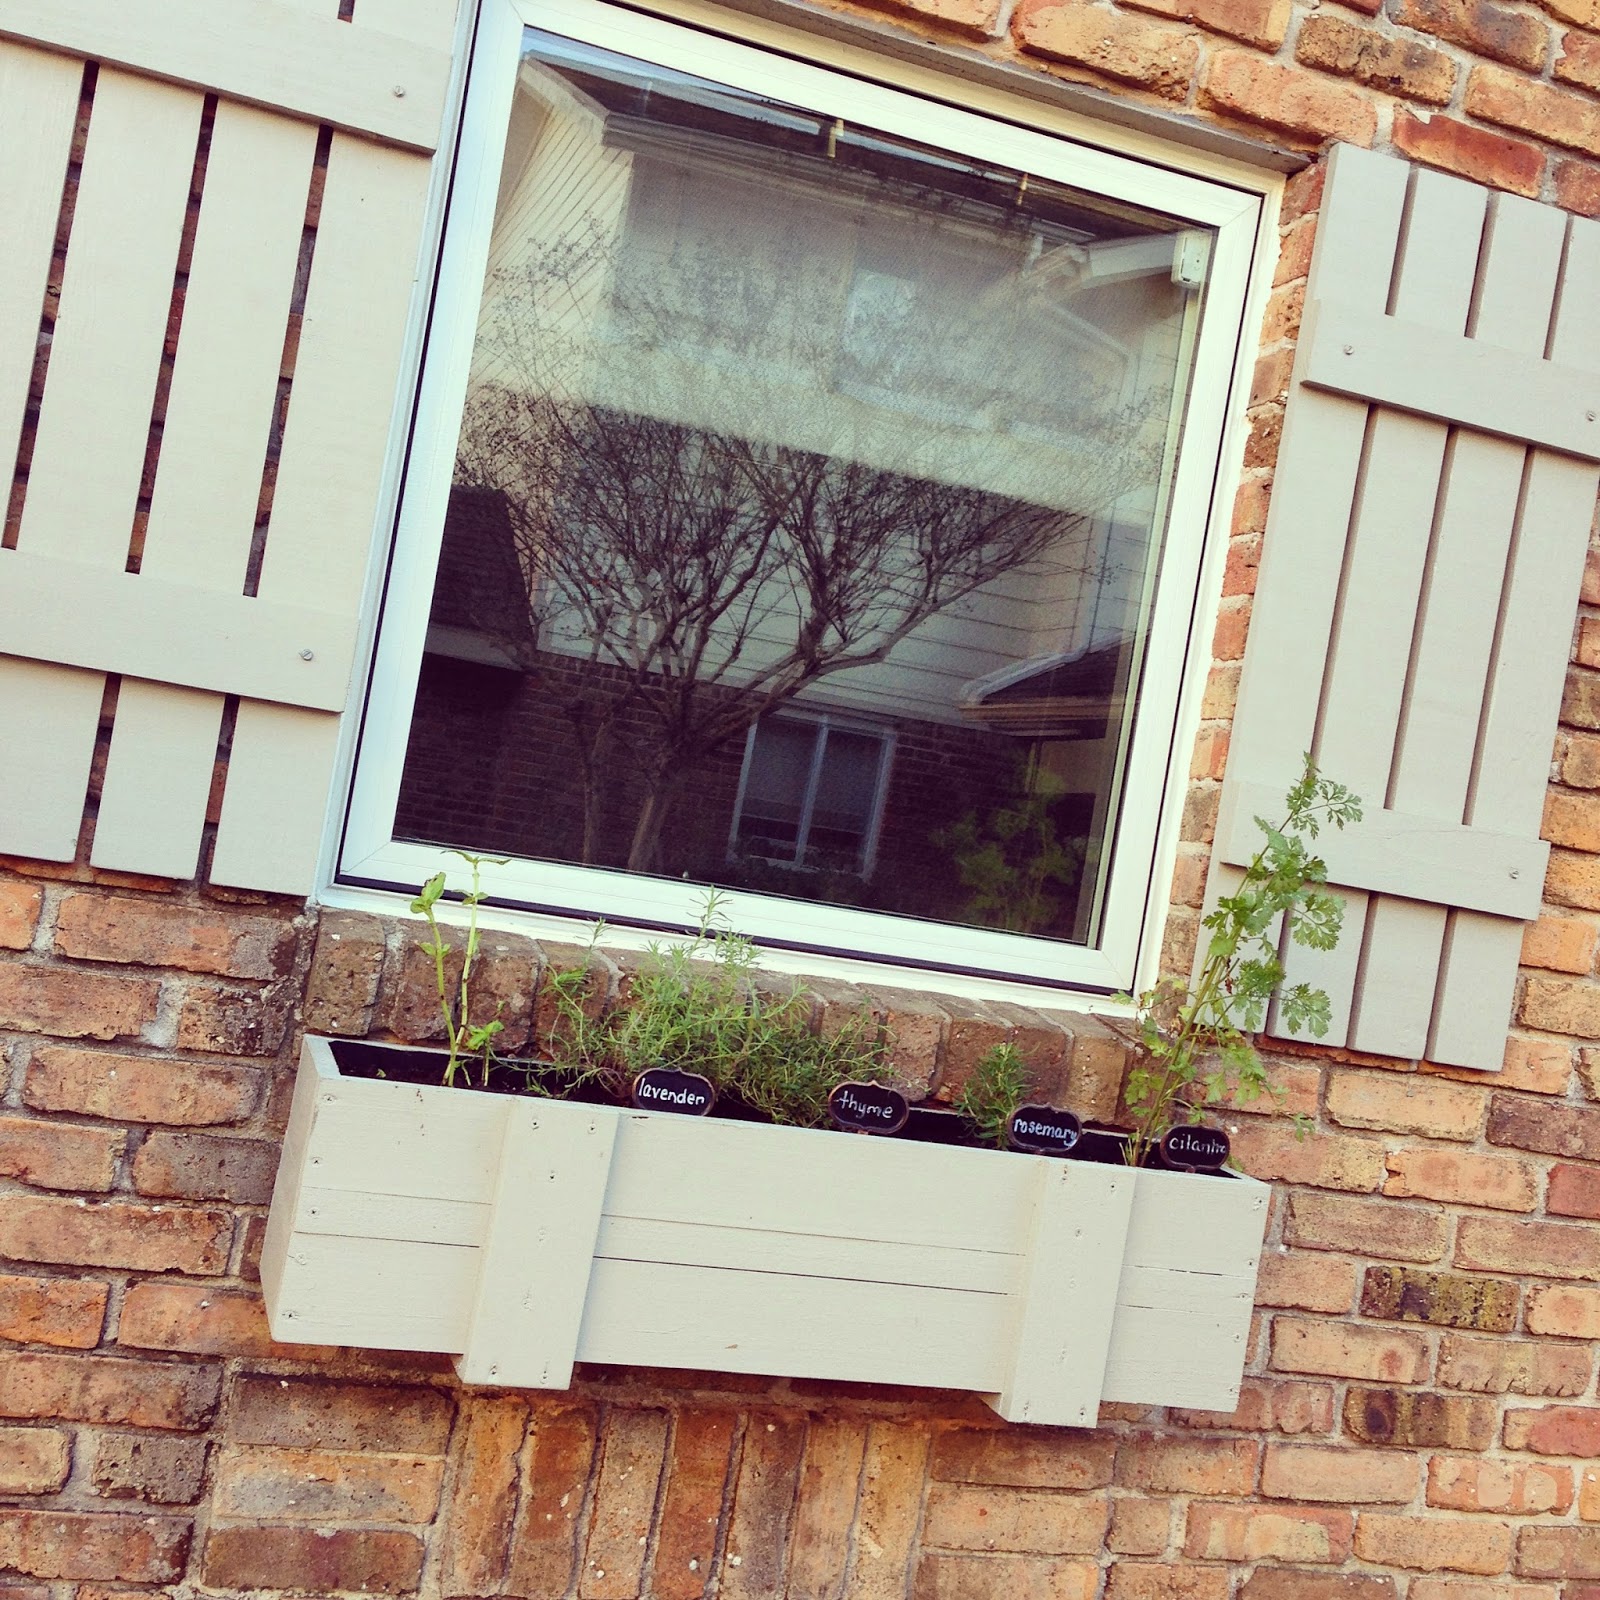
Also, because of the wood on the right side of the house, the left side looks a bit light.  There just isn't any heft to it that balances out the house.  The shutters helped, but I really felt it needed a little something, so we decided to add a window box under the kitchen window.  When I was in NYC a few weeks ago I was inspired by this lovely window box...


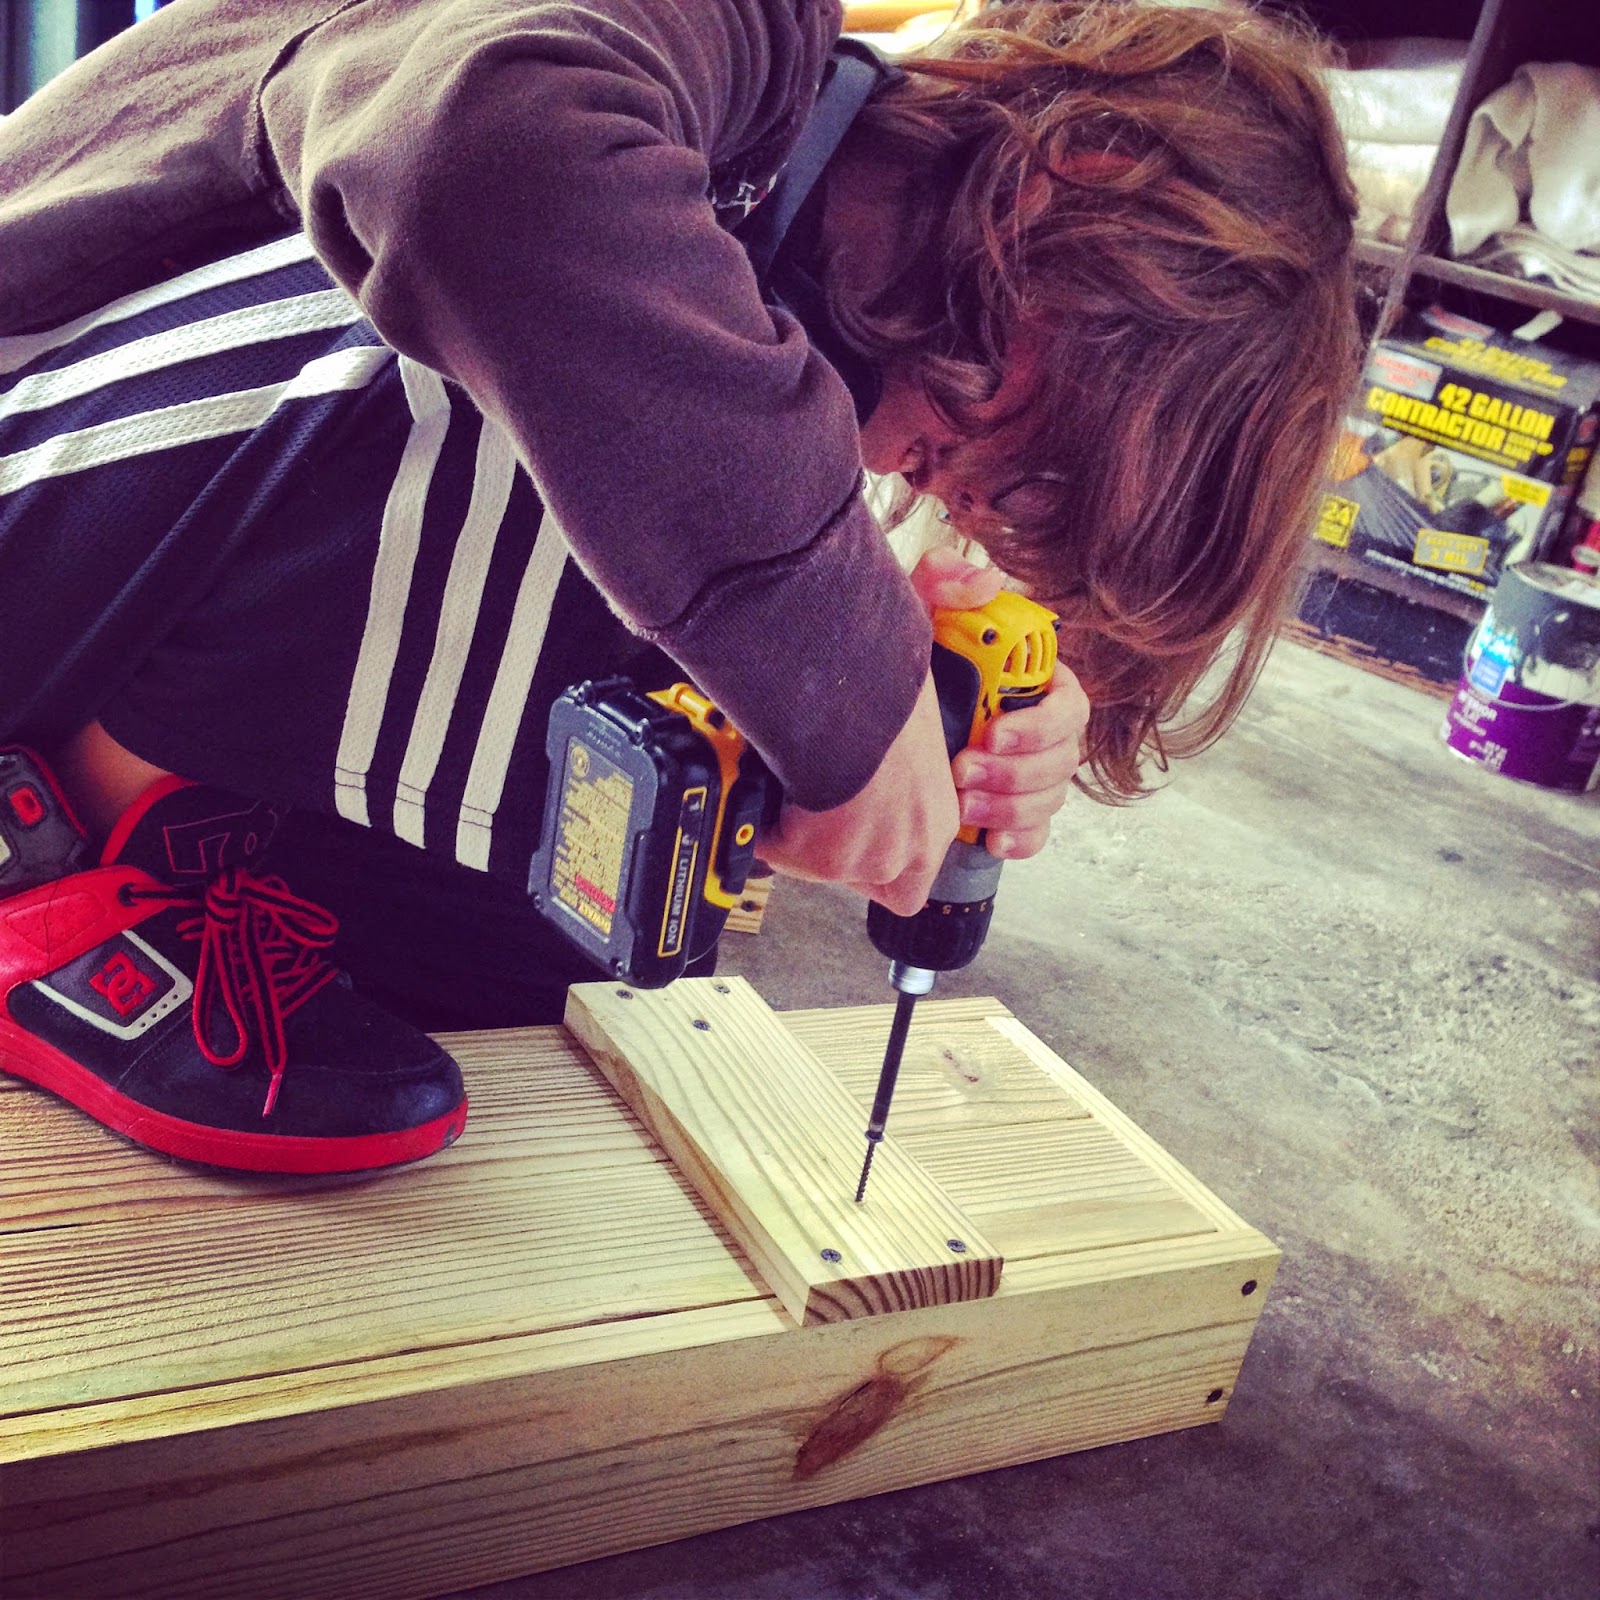
Although I love the rustic wood look, we thought ours would look better if we kept to the style of the shutters.  Travis used 1x4 treated boards and a ripped 1x2 to give the height we wanted, and used screws to attach them together.


Hunter even got in on the building.  Want to teach your child fractions and measurements?  Get them out into the workshop.  This kid struggled with math for so long, but practical application of it?- yeah, he totally gets it now.


Instead of laying a plastic liner into the box, Travis had the great idea to just use a spray in truck liner.  He is just too smart...


We let the liner dry overnight and also gave the box a coat of exterior paint (SW Pussywillow) to match the rest of the trim on the house.   Then Travis drilled two holes to attach it to the brick with masonary anchors.


I think this gives a little interest to the left side of our house, and gives me a place to grow herbs for cooking.


8.15.2014

Tiny Tudor exterior...

The front of our tiny tudor started out looking a bit tired and sad.  It just wasn't living up to it's potential, and I knew that a few key changes would give it some positive curb appeal...


I was not a fan of the blue- that was the first thing we changed.  I chose Sherwin Williams in Pussywillow for the trim and White Duck for the body of the house.  It's really more of a gray, but looks a bit greenish in this IG photo...

The lights are from Lowes and are Allen & Roth...


The front needed to have only one light on the left to balance out the door a bit better.  The shutters I was planning would cover up the hole that the light on the right would leave behind.  Travis built the shutters the same way he did for our last house.  I love the simple design of them...

Learn how to make your own here....

These were the original aluminum windows...

The old front door was not very well suited for the style of the house, and I wanted something that let in more light.  We went with a four glass window door in a dark walnut stain with ORB handles- plain Jane, nothing fancy.


The house numbers are from Ramsign and the mailbox is from Pottery Barn...
Door bell is from Restoration Hardware...


We also were faced with having to replace all of the front windows.  The old ones were the original crank out windows, and while they were charming, they were doing nothing to hold out the Texas heat.  We opted for Pella crank windows and had them installed by Lowes.  (later post on that, but I wouldn't recommend them installing anything again!)


The front also got new landscaping and a redo of the front stoop with some flagstone.  We still need to do some paint touch ups around those windows, but I am calling the exterior "finished"...


Now the Tiny Tudor stands proud!

10.27.2013

Making shutters...


I adore shutters on a home.  Maybe it's my Southern roots, but they just add charm to any cottage or castle.

current shutters...


However, I never felt as if our shutters fit the style of our cottage.  Also, they were builder grade cheap, cheap, cheap and kind of did this wonky bowing thing in the middle.

So this weekend we decided to fix all that...because I am beyond blessed to have a handy husband who doesn't think twice when I casually ask, "Hey, would it be a super big project deal to make some new shutters for the front of the cottage, because I really need something new to put up on the blog and I hate the shutters we have?"  Nope, he doesn't even blink at long run on sentences like that.

He just replies with, "Sure, I'll head to the hardware store now."   Some girls get roses- I prefer the sight of this:

Bonus- it doesn't dry up and die in a vase!


So being the magic handy man he is, he set to work on constructing some new/old rustic style shutters.

We started with some planks of wood measuring 1x6x72

Then we cut it down to 1x4


We then positioned the wood planks how we wanted them to look finished.  Three planks was the most width we could accommodate with the space we have.  We added three horizontal planks to go across the shutter.  We added a small space in between each piece to allow for swelling/shrinkage and give it more of a rustic look.


Then came the measuring, wood gluing and nail gunning...we evenly spaced the three horizontal pieces across the shutter.


Finally, it was my turn to do my paining thing...


Sherwin Williams Iron Ore...


Much happier with the overall look, and a huge thank you to my very favourite handy-man ;)
Mod Vintage Life

Liz Marie Blog

8.06.2013

Mini-pools...

Our home is small.  Our yard is smaller....

this is before we ripped out the plants along the back of the property...

each corner has a small flower bed...
So one of the things we would love to add is a pool, but honestly?  It would be the backyard if we had one.  Like the ENTIRE back yard, so not feeling that.

Plus these guys might be a bit upset not having a potty spot...


I am thinking a possible solution may be the "mini-pool".  Have y'all seen these?  Perfect for smaller yards...


I'm thinking we may have found a solution to putting a pool in our backyard...because you know it's only 110 with the heat index today here in Texas...